


Film grain that looks good + free film grain scan
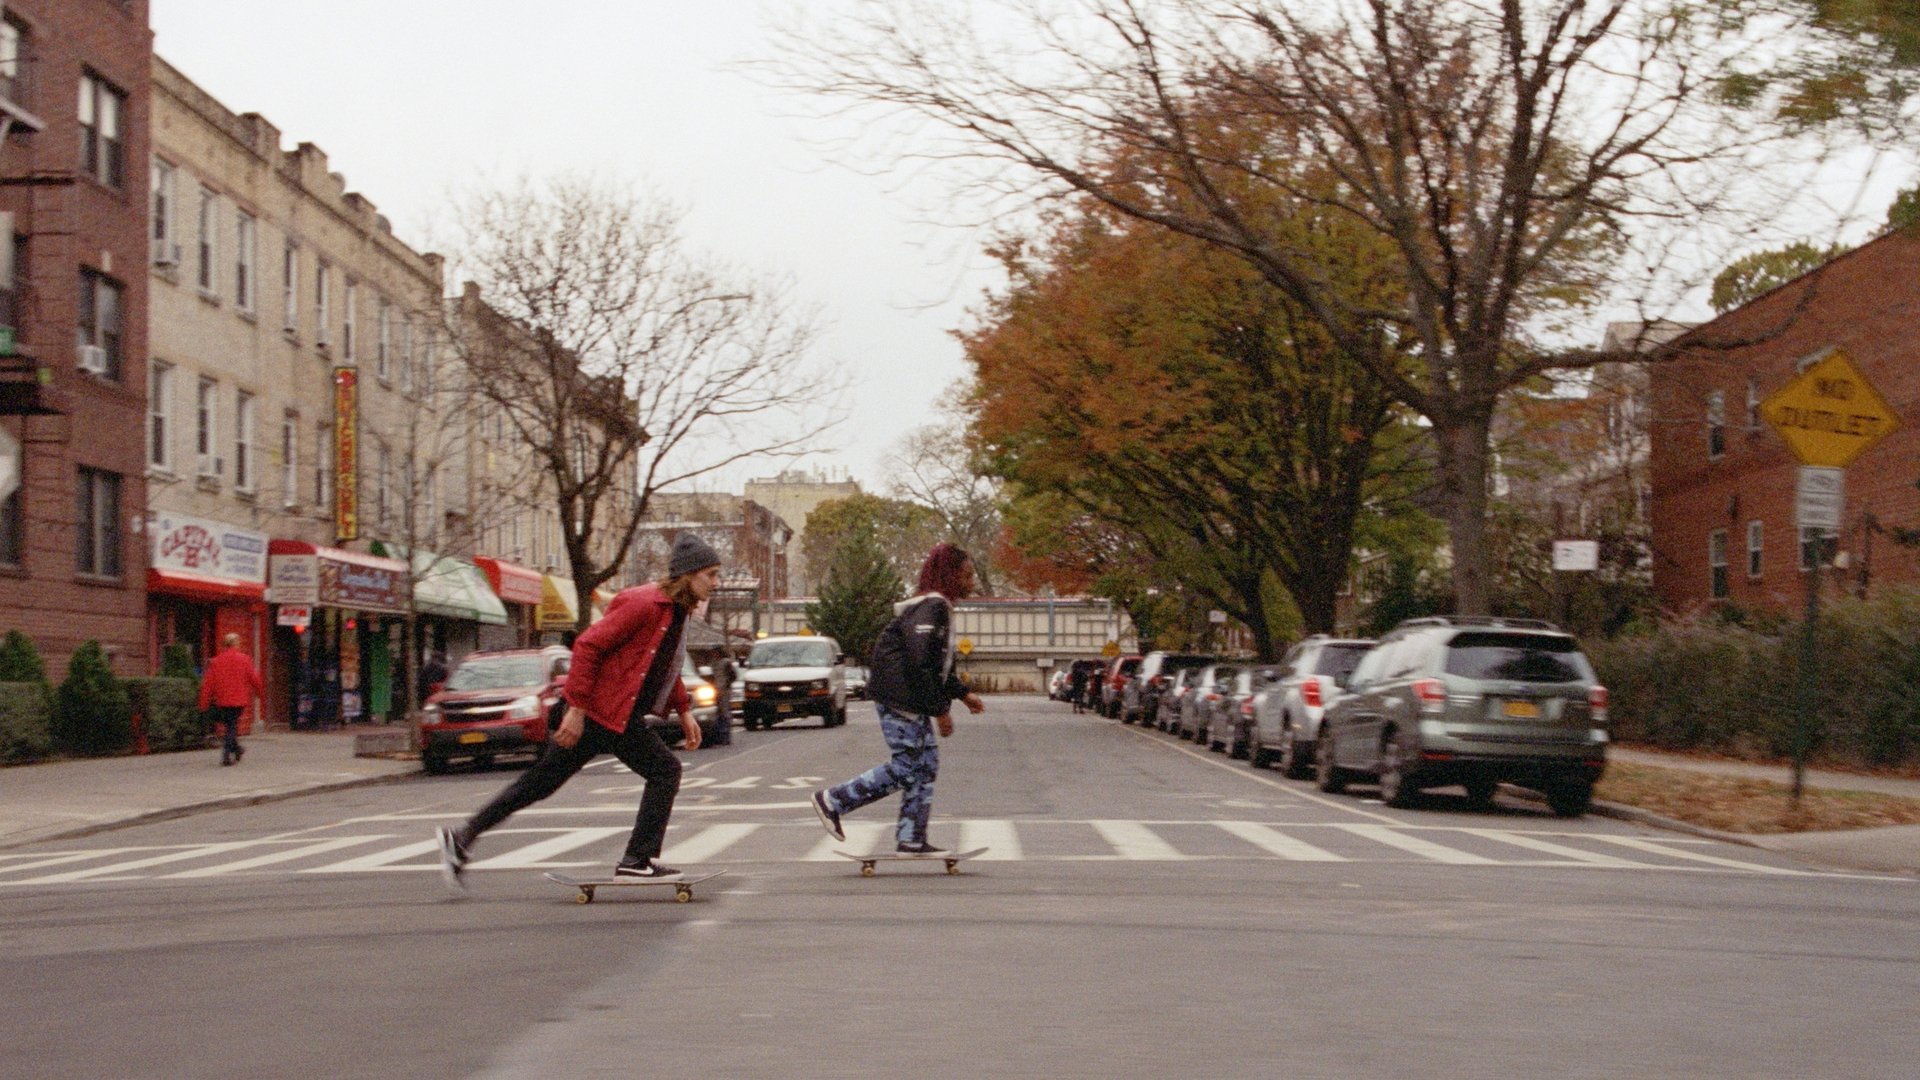
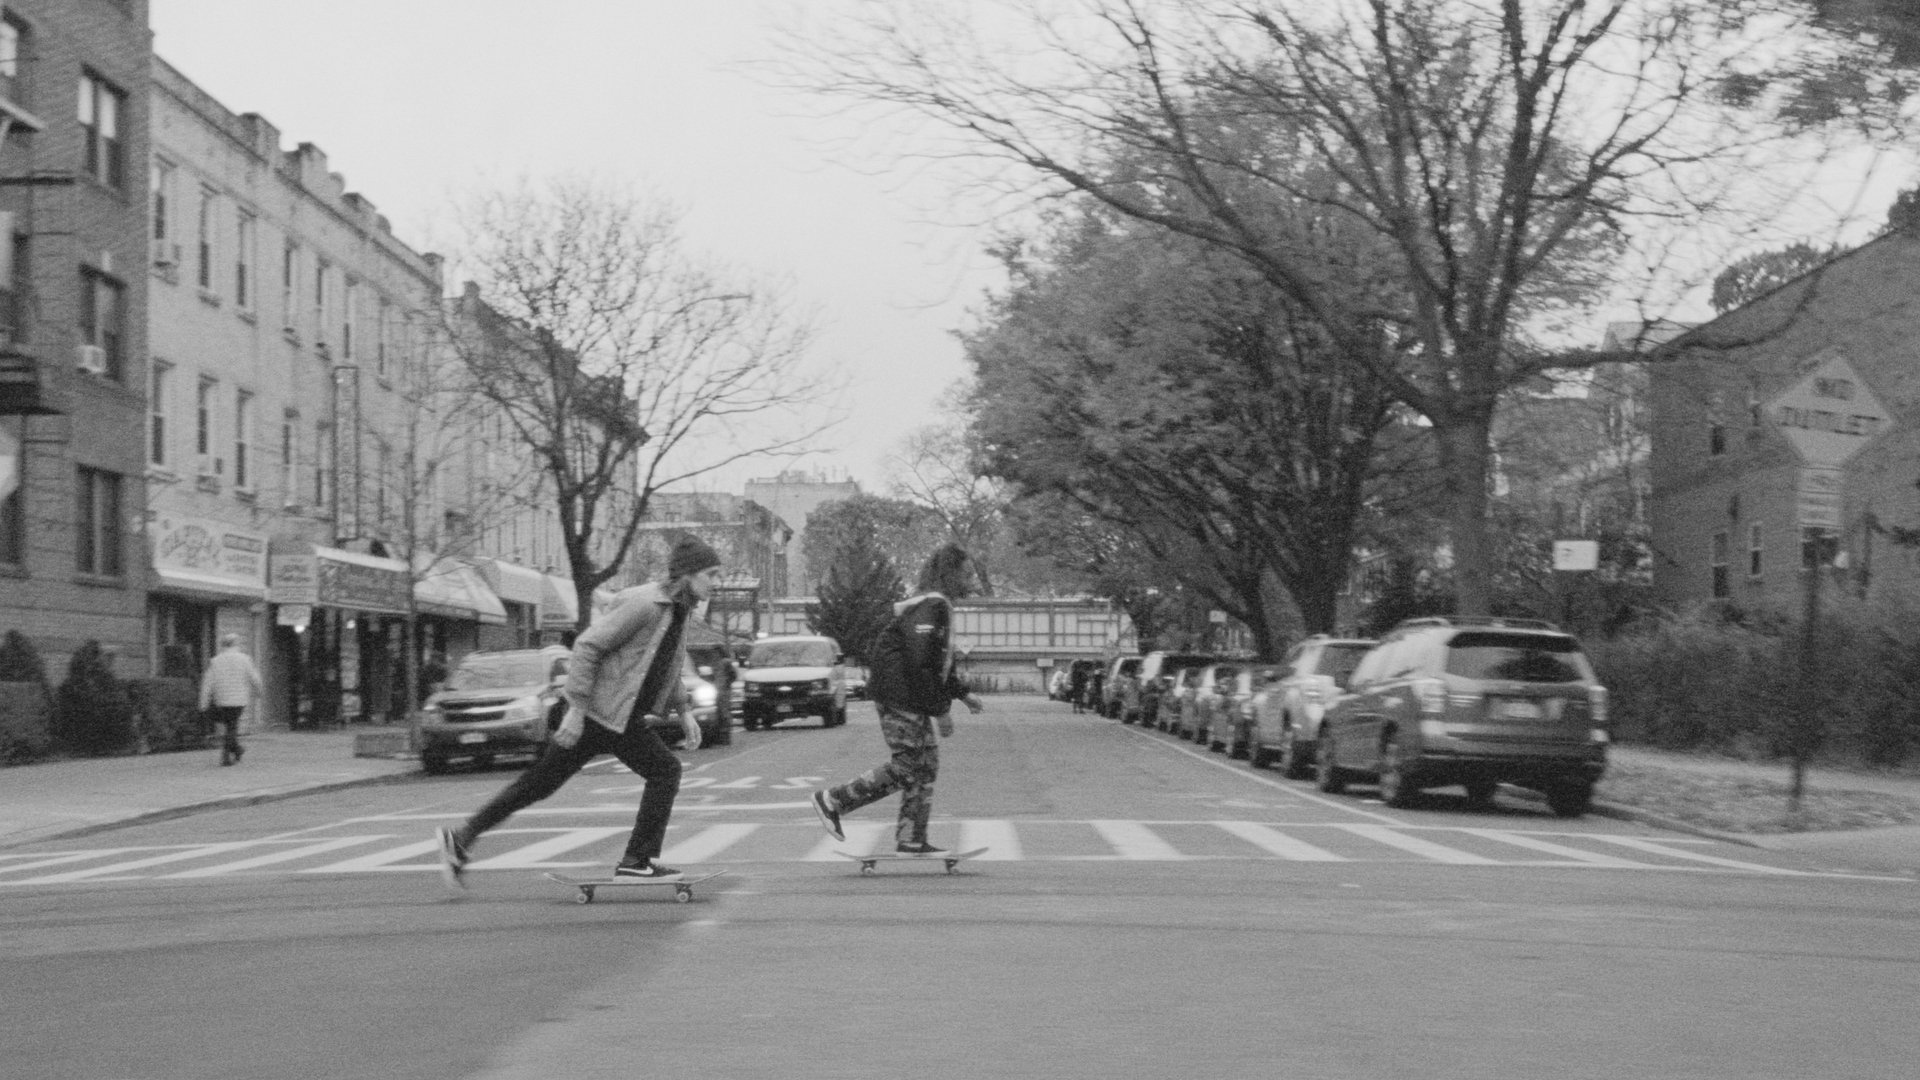
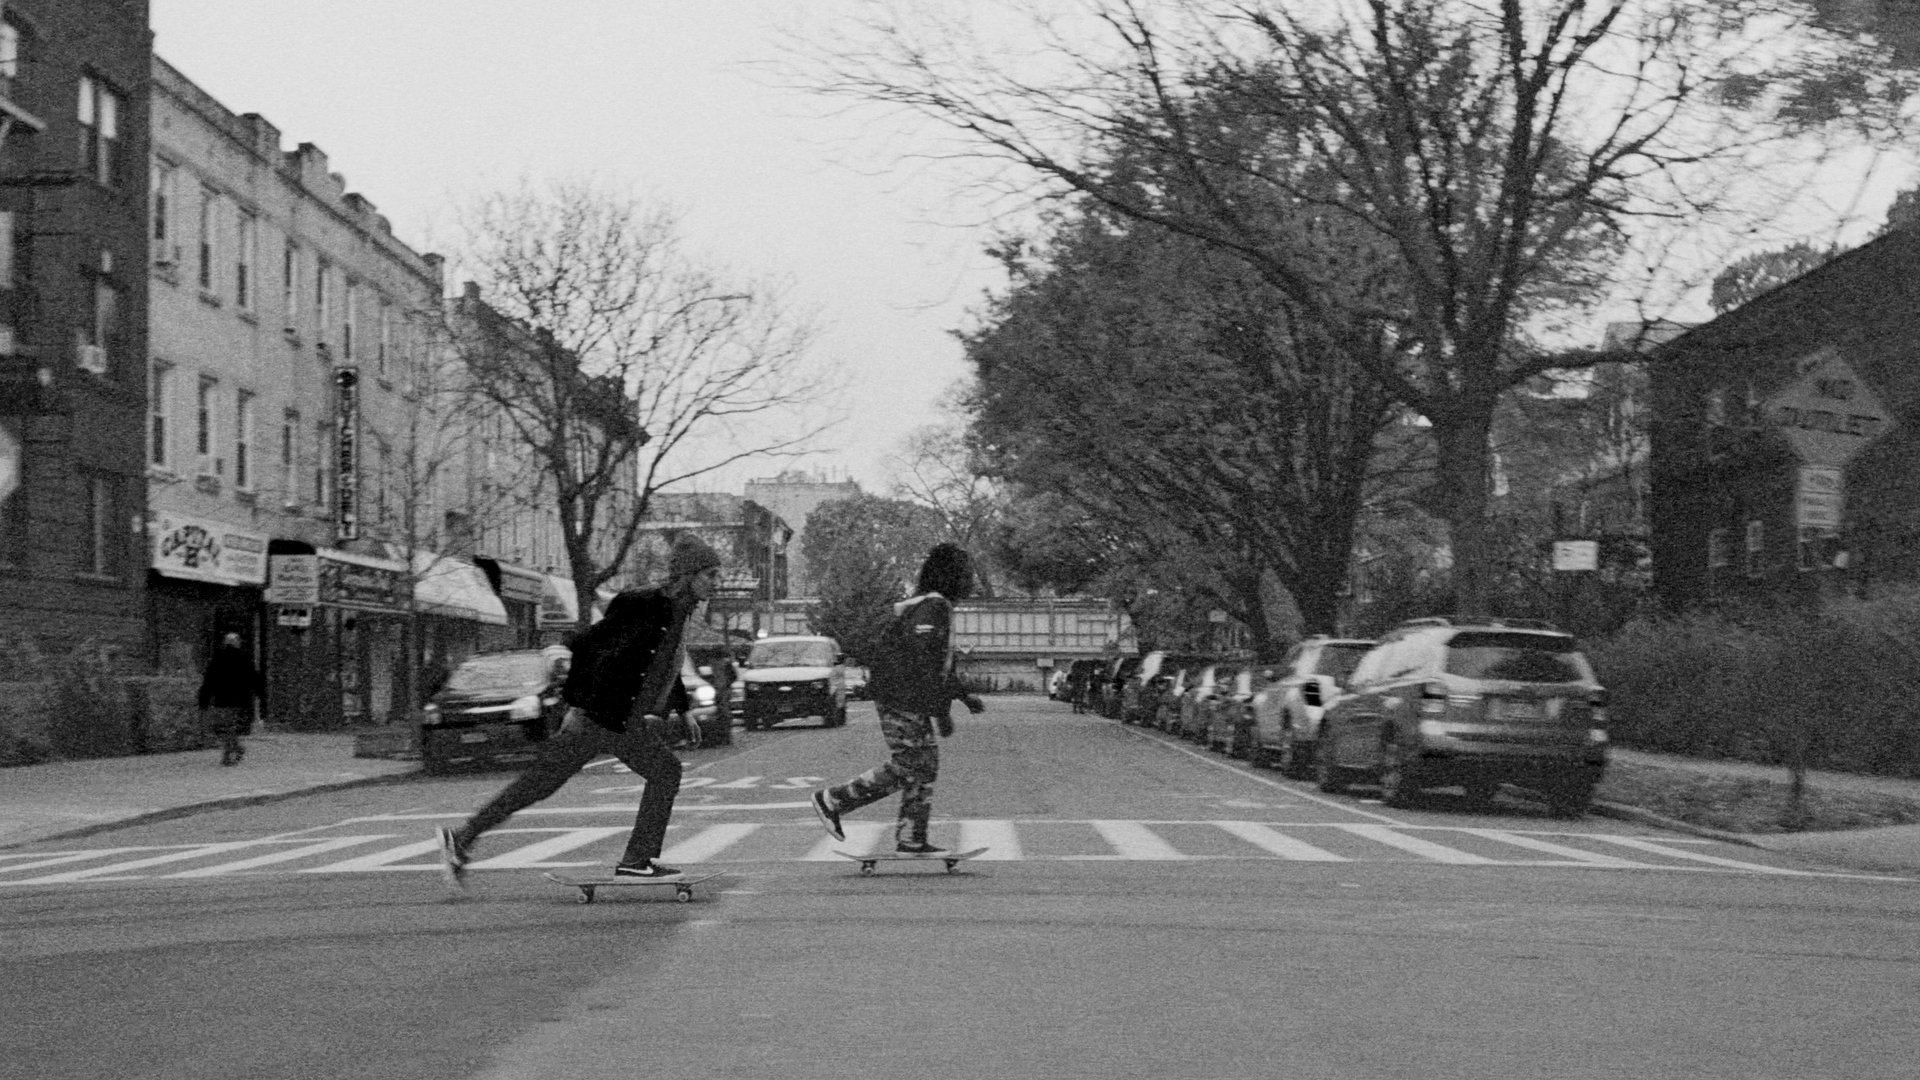
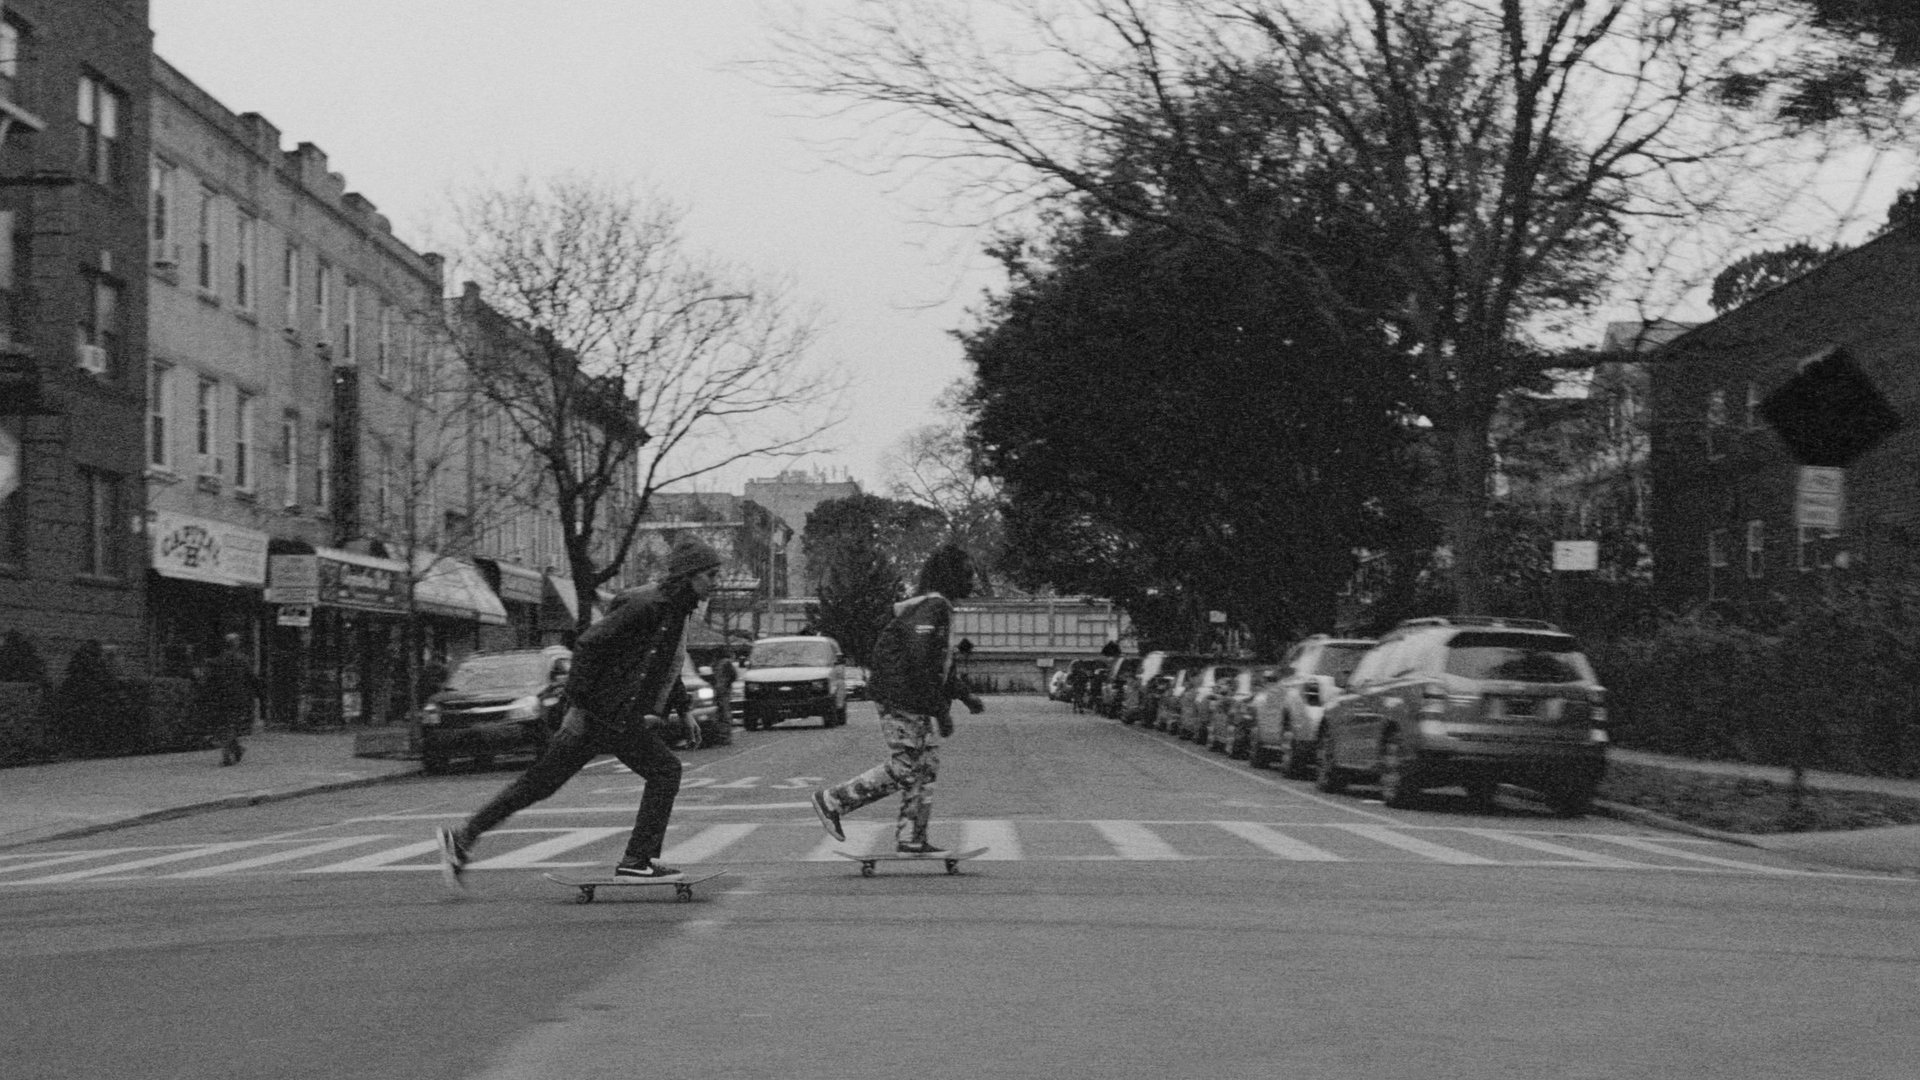
To get the best result from the DaVinci Resolve plugin, we need to analyze film grain patterns. The image below was shot on a 35mm Kodak 500T film. The grain is present in the entire tonal range but most visible in the mid-tones. Looking at individual color channels reveals that the blue and green channels are grainier than the red.
The paradox of film grain is that film manufacturers spend decades improving film and reducing the amount of visible grain, yet, in modern filmmaking, we're paying for tools to emulate film imperfections including grain. It's similar to vinyl crackle and old preamp hiss in the audio world; the tiny imperfections bring more life into digital signals. In this post, we will discuss the use cases of film grain. The best settings for DaVinci Resolve's film grain plugin and share a free film grain overlay file.
There are multiple reasons for using film grain:
Film aesthetics: When digital media is stylized for film using color tools and grain. This is very common in modern cinema. For example, Dune (2024) was filmed with digital cameras and then printed and scanned on film for a specific look.
Masking digital artifacts: Film grain can make the image look more organic. If a clip has a large area of blown-out highlights or heavy noise reduction applied, adding film grain even at low intensity can help in these situations.
3. Improving texture: Because many modern prosumer cameras use the H.265 codec, which doesn't retain texture well, adding film grain even at low intensity almost always looks better than the original.
There are multiple ways to add film grain in editing software:
Plugins: such as Dehancer, Film Convert, and Filmbox. They allow for more control over the image and can be tweaked to the desired result. DaVinci Resolve Studio version comes with a built-in film grain plugin. It's not as good as Filmbox or Dehancer but looks pretty convincing with the correct settings.
Film scan overlays: a scanned film greyscale with the grain that overlays on top of another file.
To get the best result from the DaVinci Resolve plugin, we need to analyze film grain patterns. The image below was shot on a 35mm Kodak 500T film. The grain is present in the entire tonal range but most visible in the mid-tones. Looking at individual color channels reveals that the blue and green channels are grainier than the red.
Based on this information, we can set up the film grain plugin in DaVinci Resolve to look more authentic:
Use custom mode instead of overlay mode to affect highlights.
Adjust grain size based on the film type (8mm, 16mm, or 35mm).
Set grain intensity depending on your project needs. Use higher intensity for web uploads to compensate for compression.
Tweak tonal grain distribution, emphasizing more grain in the mid-tones than shadows and highlights.
Reduce grain impact on the red channel for a subtle chroma effect in the grain.


You can also download the drx file with the settings.
For the free version of DaVinci Resolve or another NLE, you can use a film grain scan in overlay composite mode. Here’s a link to the 10-second real film grain scan in 4K DCI resolution. You can control the intensity by adjusting opacity or adding/reducing contrast on the grain layer. The main downside of this method is that it looks less organic despite using real grain. Because the clip is only 10 seconds long, you need to retime it and flip it throughout the video to hide the looping.
Keep in mind, that YouTube and other video hosting platforms don’t preserve grain because of the heavy compression but there are ways to minimize quality loss when uploading to the web. Check one of our older posts on how to preserve quality when uploading to the web and creating small files.